Minting Your First AI-Generated NFT
March 15, 2025
DigitalArtifact makes it easy to create stunning AI-generated artwork and mint it as an NFT in just a few simple steps. This guide walks you through the entire process from image generation to blockchain minting.
Creating Your Image
Start by generating an image using our AI models. Enter a prompt like "A surfer during a tropical sunset" and select your preferred style and model. Our Stable Diffusion model produces beautiful, detailed illustrations perfect for NFTs.
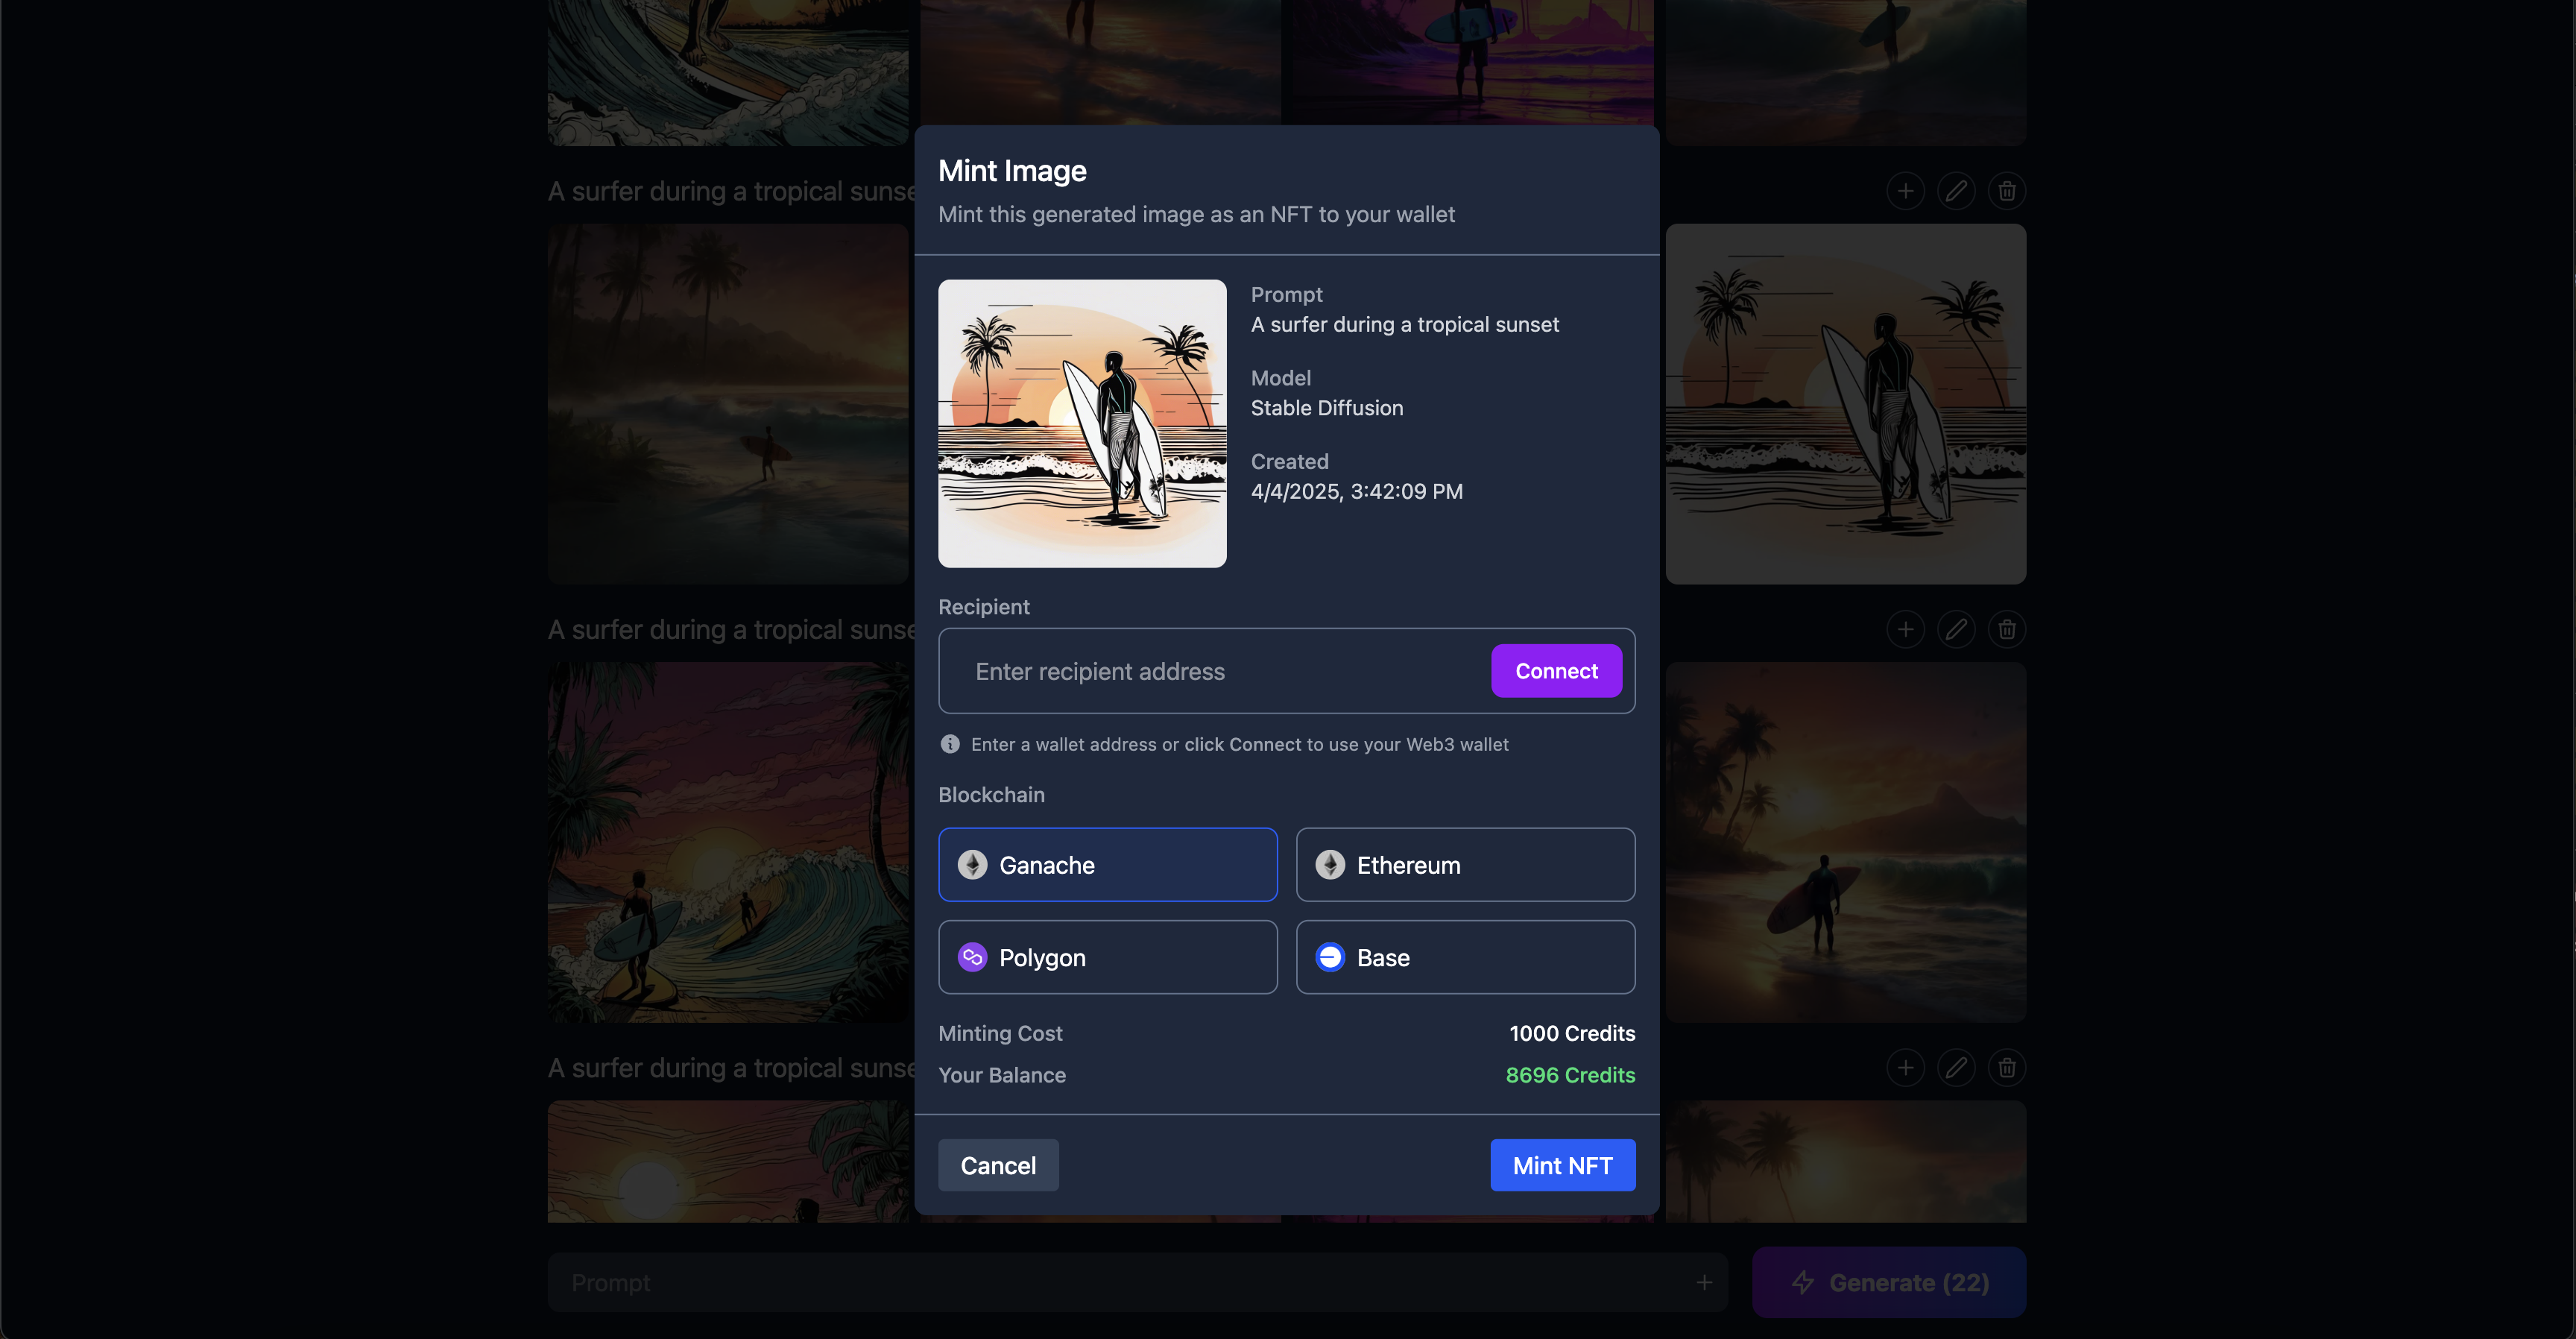
Once you're happy with your creation, you can view its details or proceed directly to minting.
Connecting Your Wallet
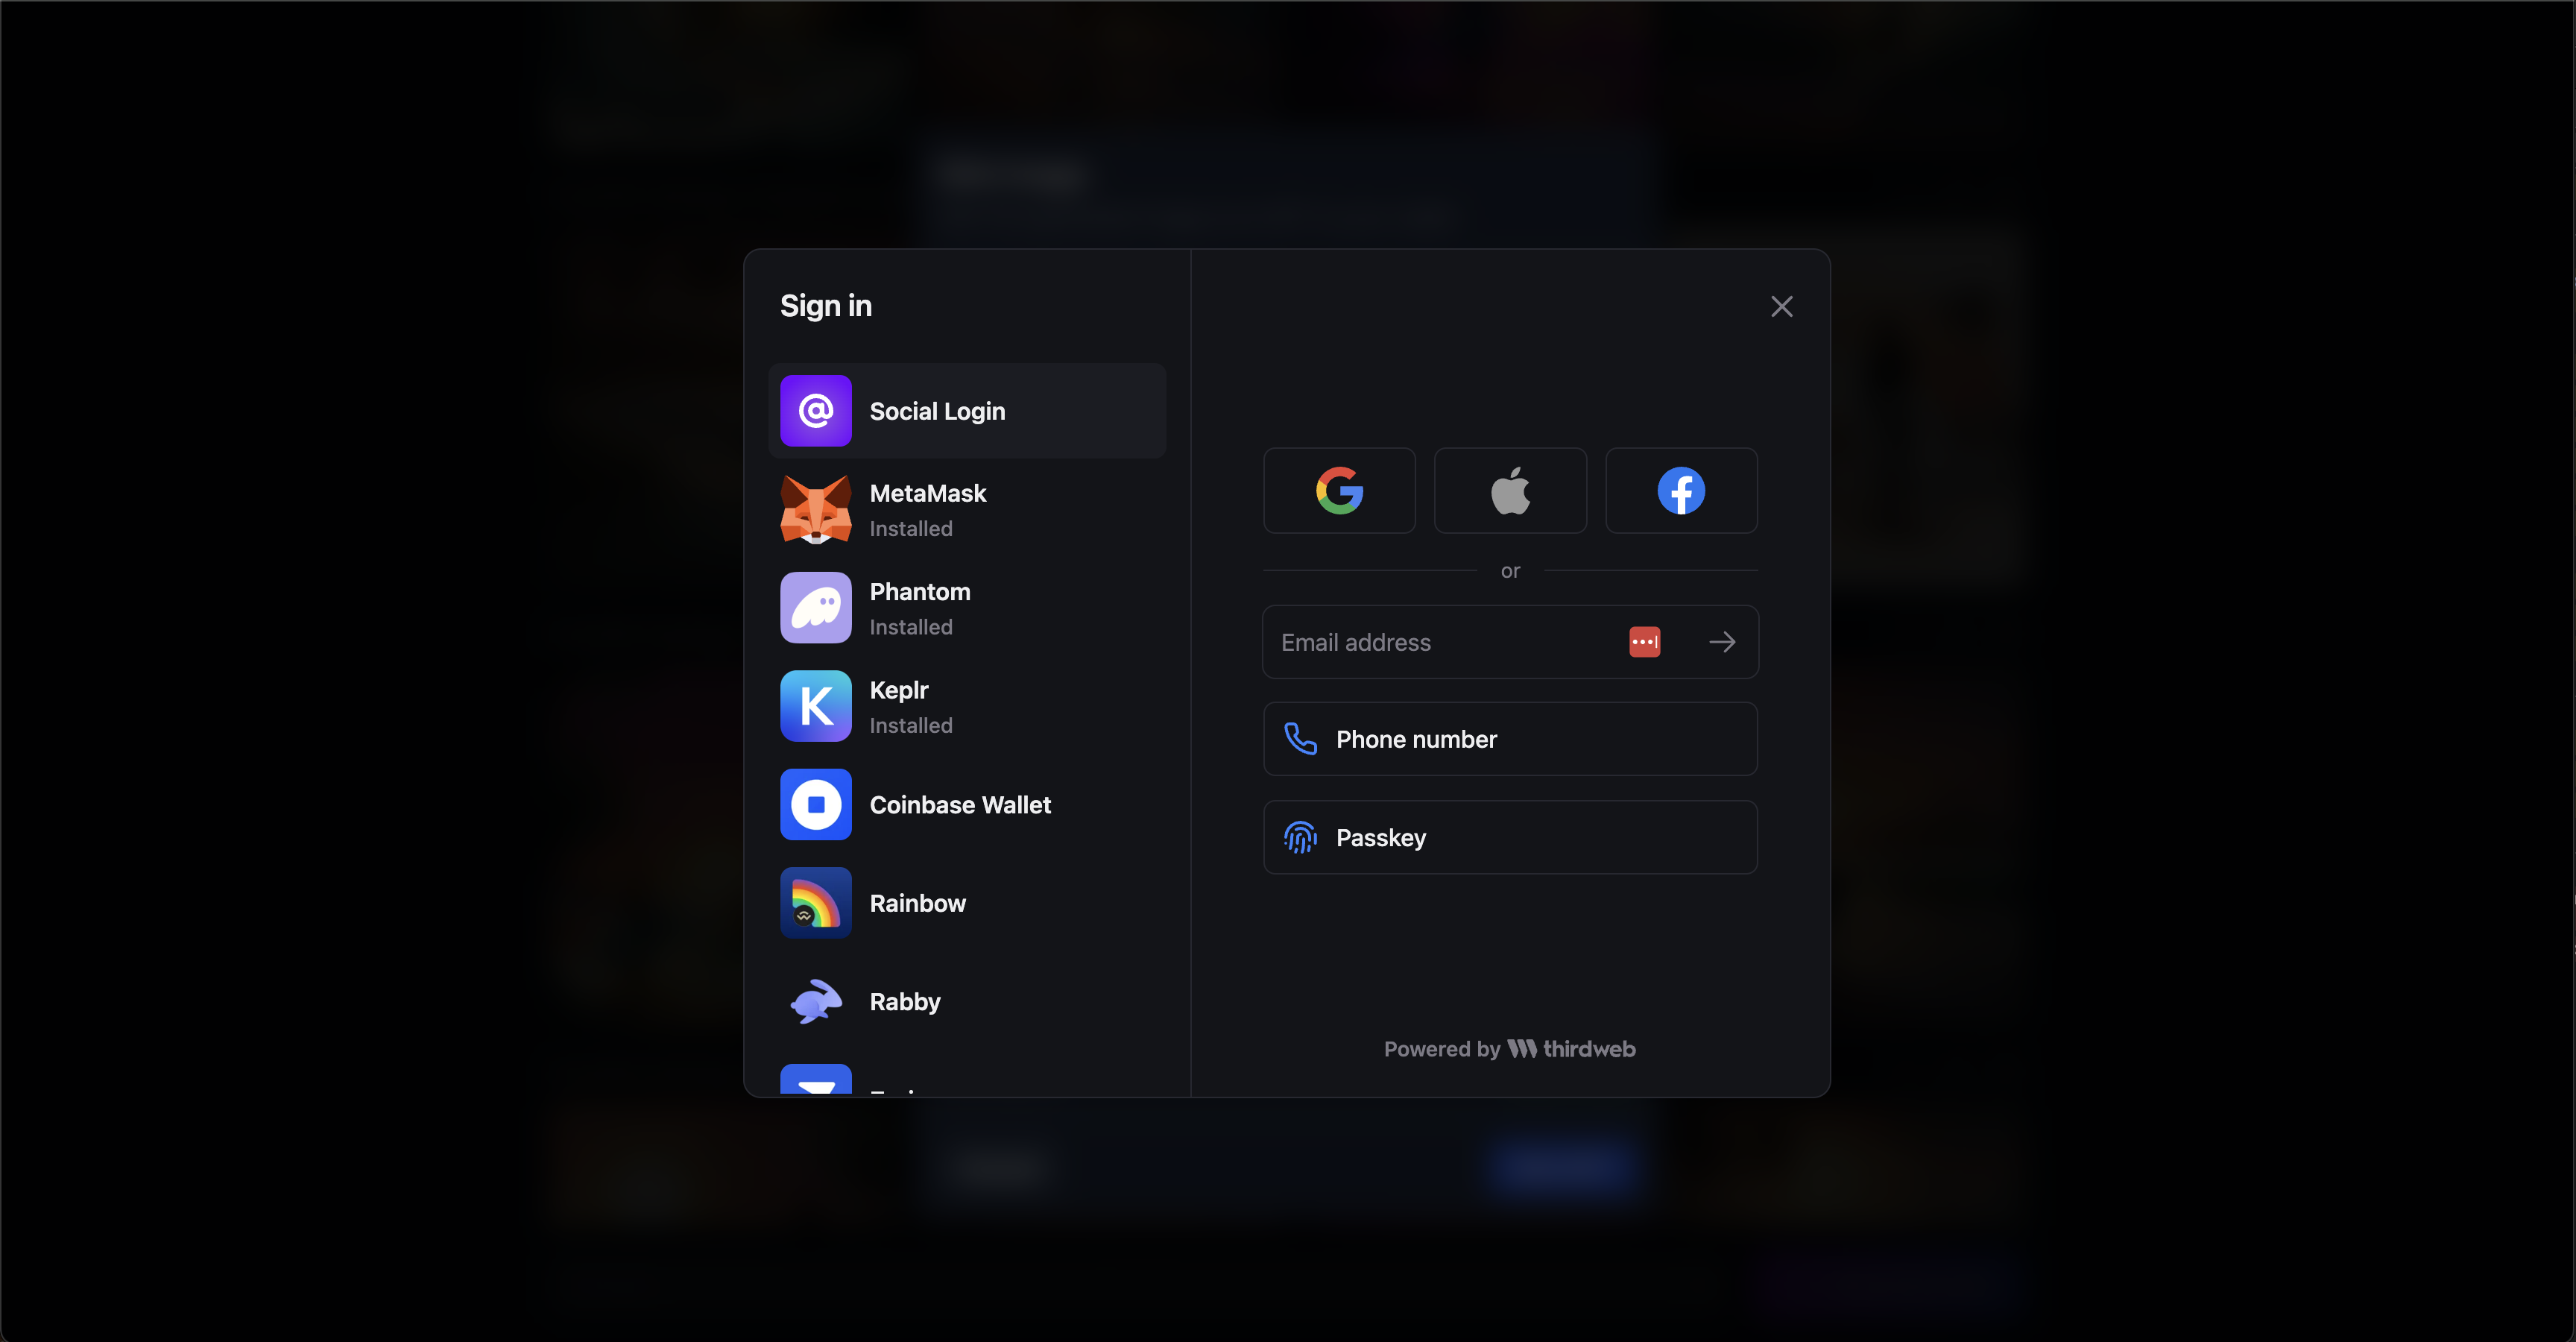
To mint your image as an NFT, you'll need to connect a Web3 wallet:
- Click the "Mint Image" button
- If you're not signed in, you'll see our sign-in screen
- Choose from multiple wallet options:
- MetaMask
- Phantom
- Keplr
- Coinbase Wallet
- Rainbow
- Or connect via social login, email, phone number, or passkey
Choosing Your Blockchain
DigitalArtifact supports minting on multiple blockchains:
- Ganache: Great for testing with minimal fees
- Ethereum: The most established NFT ecosystem
- Polygon: Lower fees with Ethereum compatibility
- Base: Optimized for speed and low transaction costs
Select the blockchain that best suits your needs based on factors like transaction fees, ecosystem, and your target collectors.
Minting Costs
Minting an NFT requires credits. The cost of minting is displayed during the minting process.
In our example, the user has 8696 credits available and the mint costs 1000 credits.

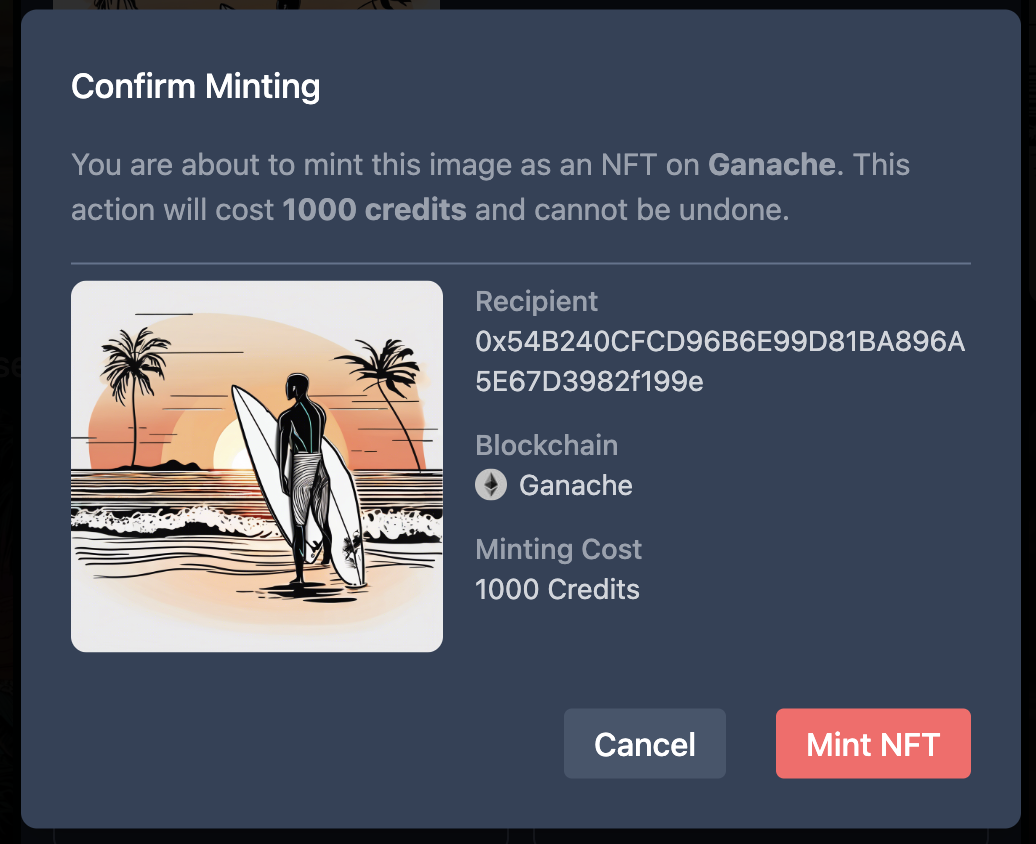
Finalizing Your NFT
After selecting your blockchain and confirming the recipient wallet address, you'll see a confirmation screen with all the details:
- The image to be minted
- Recipient wallet address
- Selected blockchain
- Final minting cost
Click "Mint NFT" to complete the process. This action cannot be undone, so double-check all details before confirming.
Managing Your NFT Collection
After minting, your new NFT will appear in your connected wallet and in your DigitalArtifact profile under "My Collection." From there, you can:
- View minting details and transaction history
- Share your NFT on social media
- List it for sale on supported marketplaces
- Transfer it to other wallets
Need More Credits?
If you need more credits for minting, visit the Credits section in your dashboard to purchase one of our packages.
Ready to create your first NFT? Get started now or check out our FAQ section for more information.